Technically speaking, the CPU serves as the computer’s brain. Your system won’t fire up without the CPU. A CPU’s arithmetic logic unit can do calculations, store instructions, and manage computer processes, among other tasks. Additionally, the CPU works with the associated computer hardware.
The fetch, decode and execute stages of a process are typically divided up by the CPU. Regarding architecture, there are numerous CPU types. CPUs with one core, two cores, four cores, and even six cores are available and are regarded as mainstream.
Make sure your BIOS has been updated and the initial thermal paste has been removed before installing a new CPU.
0. Check the type of CPU socket on the motherboard.
We won’t go into too many details here, we’ve covered CPU compatibility in-depth in this other article, here have a look if you before moving forward.
Here’s a quick summary of it in case you want to get everything up and running quickly:
- You can search your Motherboard Manufacturer & model along with “CPU Compatibility” to find out the compatibility between your motherboard and CPU.
- Be sure to verify the BIOS version as well to ensure that it’s compatible( you can find this in the article I mentioned above)
There are 3 types of sockets:
- LGA
- BGA
- PGA
Intel typically uses LGA-type sockets and these are named something like this LGA1151, so a CPU and motherboard have to be this same type BUT also have to be compatible with each other as we discussed in that same article I mentioned above that Intel CPUs aren’t always compatible with the same socket type CPUs, especially ones that came after.
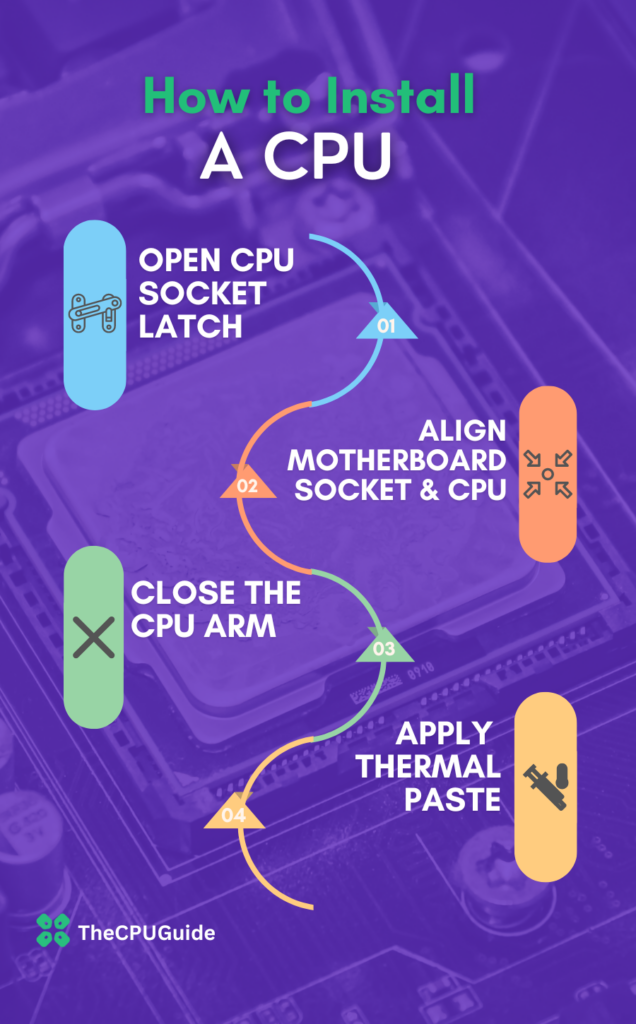
1. Unbuckle the CPU Socket latch.
After we know our CPU is compatible with our motherboard. It’s time to open the CPU socket arm and remove the CPU socket cover gently. This is for Intel CPUs, AMD motherboards don’t need cover since they come in PGA format. Meaning the pins are on the CPU itself and not on the motherboard socket.
Be VERY careful with LGA motherboards at this point and keep away from the pins inside so you don’t bend them. If bent, fixing them is very difficult, and if left bent may cause issues with the computer or complete hardware failure!
On the other hand, AMD users better are VERY careful handling their processor since bending pins is very easy and if done may ruin your processor completely!
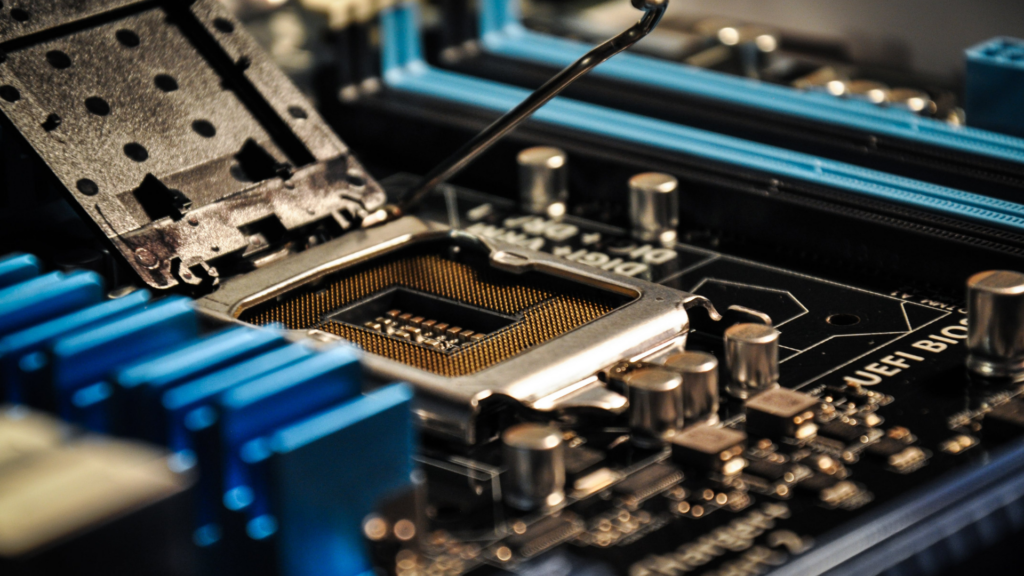
2. Aligning the motherboard socket and CPU.
Intel has two small gaps and a small triangle logo and AMD has a small triangle logo.
Place your CPU aligned with the socket properly gently and confirm it is in place with a gentle soft touch to make sure it is seated.

CAUTION!Do NOT touch the pins on the motherboard or CPU or the contacts either to avoid bent pins or any oil residue.
Bent pins can be fixed but with a precision hand, some tweezers, and or a sewing needle BUT I would advise caution as a better remedy. It will lead to a much smoother install if you just do everything very very slowly and gently without sudden jerks and movements to avoid any kind of damage.
Note: The processor should fit in snugly and smoothly, if this doesn’t happen gently lift it up and verify and make sure you didn’t bend any pins and place it correctly.
3. Close the CPU arm.
After you’ve placed the CPU inside the socket correctly you will need to close the retention arm that we opened before to secure the CPU in place.
After you fix the small lever under the hook, the CPU installation is finished.
4. Apply Thermal Paste.
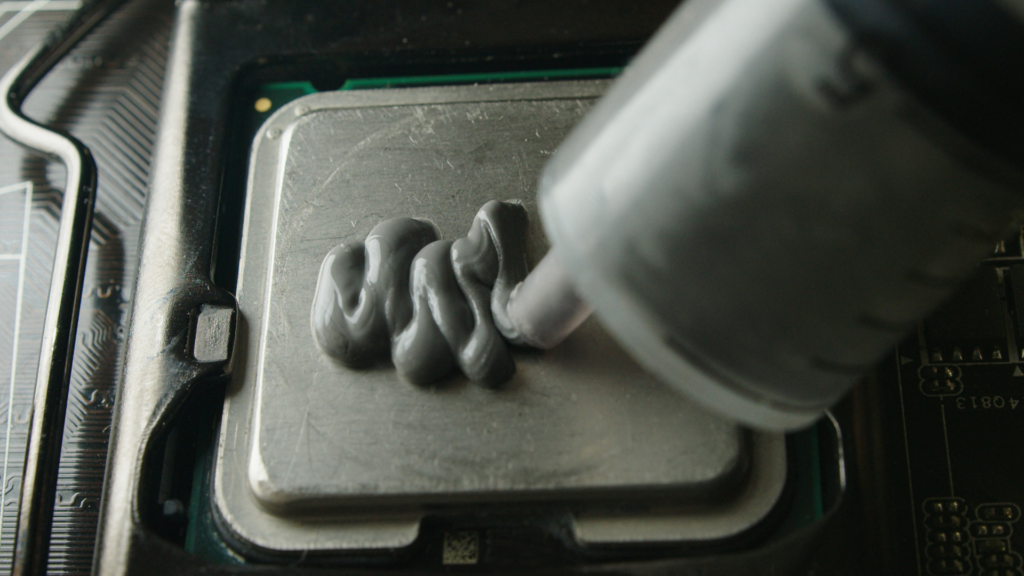
Just apply a small pea-sized droplet of some decent thermal paste, Something like THIS, and spread it evenly across the processor to ensure optimum contact so that thermal efficiency is met and each core is evenly cooled.
These steps are summarized in the picture below:
Electronic Safety

When handling a processor, one should take certain precautions. Bare hands should not make contact with the pins. This is due to the static charge that the human body carries, which could result in a short circuit. Make sure you are not wearing anything wool-like when installing a CPU to prevent creating more static electricity.
You should have some safety gear that will help prevent short circuits if you intend to operate on the motherboard. It would be beneficial if you turned off your computer as well before accessing any system cases.
I recommend using an anti-static wristband to offer protection from harmful static electricity to your PC while you work on it.
End Note
Beware that using a bad or dead CPU puts your motherboard at serious risk. It can cause the motherboard to produce slow short circuits. Consult a specialist if you are unsure of how to distinguish between a dead and a functional CPU. Most of the time, the entire motherboard needs to be replaced if the CPU socket becomes damaged.
Therefore, it’s crucial to manage these sensitive components carefully. Installing a CPU is not difficult for a beginner. The right steps are all that is required. YouTube tutorials are another option.
Follow the instructions exactly as written and you should be fine.